WooCommerce 安装指南
本指南帮助商家快速接入 StablePay WooCommerce 支付插件,为您的 WooCommerce 商城添加稳定币支付能力。
一、前置准备
1.1 环境要求
在开始接入前,请确认您的 WordPress 环境满足以下要求:
| 项目 | 最低版本 | 推荐版本 |
|---|---|---|
| PHP | 7.4+ | 8.0+ |
| WordPress | 5.8+ | 最新版 |
| WooCommerce | 6.0+ | 最新版 |
必需的 PHP 扩展:
- cURL(用于 API 通信) - JSON(用于数据处理)
1.2 获取 StablePay 商户账号
请联系 StablePay 服务人员为您开通商户账号。账号开通后:
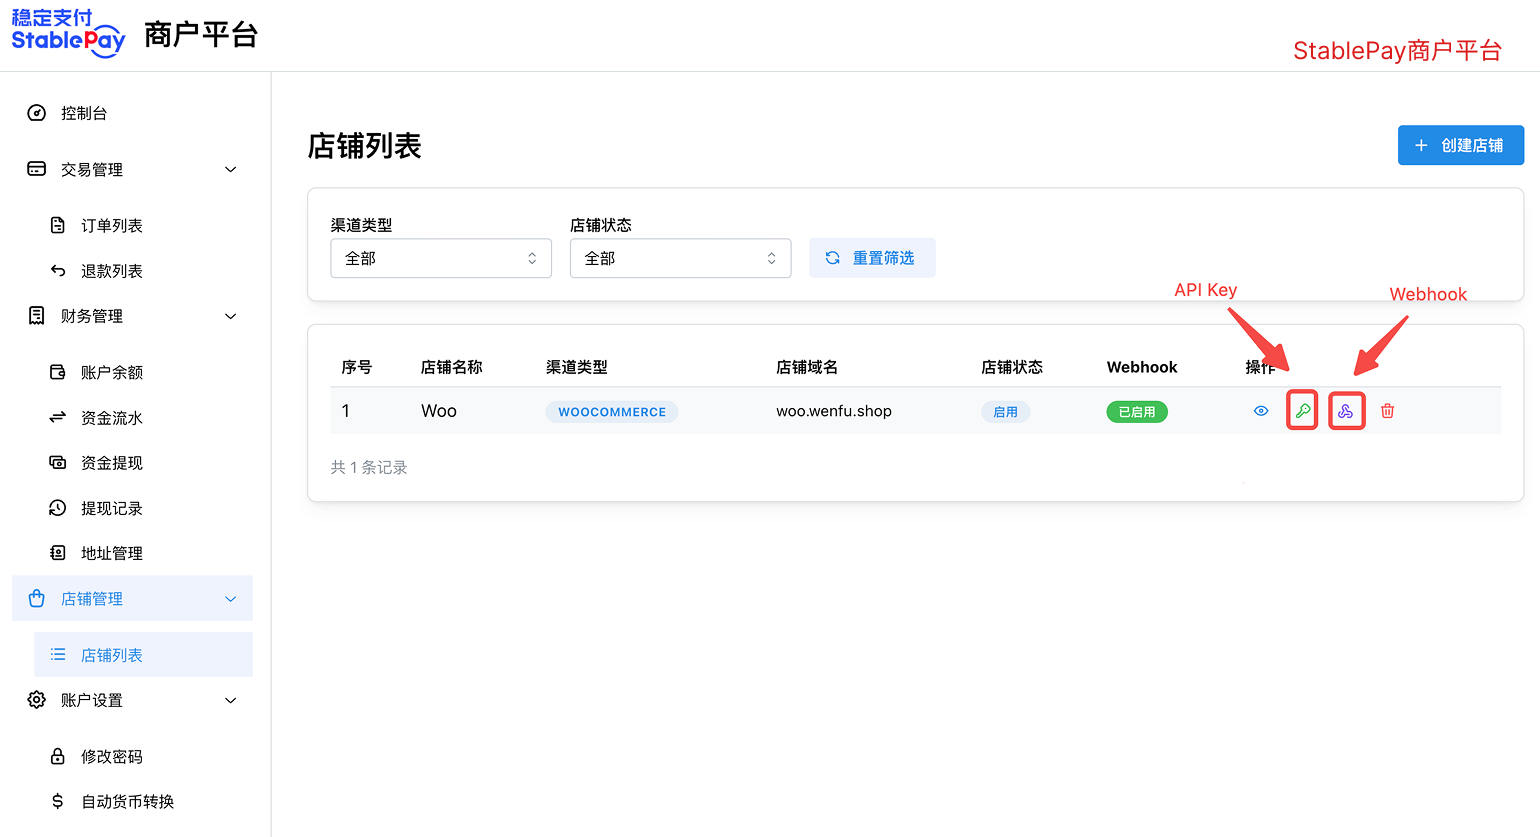
- 登录 StablePay 商户后台
- 进入 店铺管理 页面,点击 [创建店铺],渠道类型 选择Woocommerce,提交后等待StablePay审核
- 审核通过后,您可以通过店铺列表操作,获得密钥API Key、Secret Key、Webhook Secret
二、安装插件
2.1 获取插件包
点击下载最新版本的插件安装包:
2.2 安装方式一:WordPress 后台安装(推荐)
- 登录 WordPress 管理后台
- 进入「插件」→「安装插件」→「上传插件」
- 点击「选择文件」,选择
stablepay-woocommerce-x.x.x.zip - 点击「现在安装」
- 安装完成后点击「激活插件」
2.3 安装方式二:FTP 手动安装
- 解压
stablepay-woocommerce-x.x.x.zip - 通过 FTP/SFTP 上传解压后的
stablepay-woocommerce目录到wp-content/plugins/ - 登录 WordPress 后台,进入「插件」页面
- 找到「StablePay for WooCommerce」并点击「激活」
三、配置插件
3.1 进入配置页面
激活插件后,通过以下方式进入配置页面:
- 方式一:WordPress 后台 → WooCommerce → 设置 → 支付 → StablePay
- 方式二:WordPress 后台 → 插件 → 已安装的插件 → StablePay for WooCommerce → 设置
3.2 基础设置
| 配置项 | 说明 | 建议值 |
|---|---|---|
| 启用/禁用 | 是否在结账页面显示 StablePay 支付方式 | 启用 |
| 支付标题 | 结账页面显示的支付方式名称 | StablePay - 稳定币支付 |
| 支付描述 | 支付方式的简要说明 | 使用 USDT、USDC 等稳定币安全快速支付 |
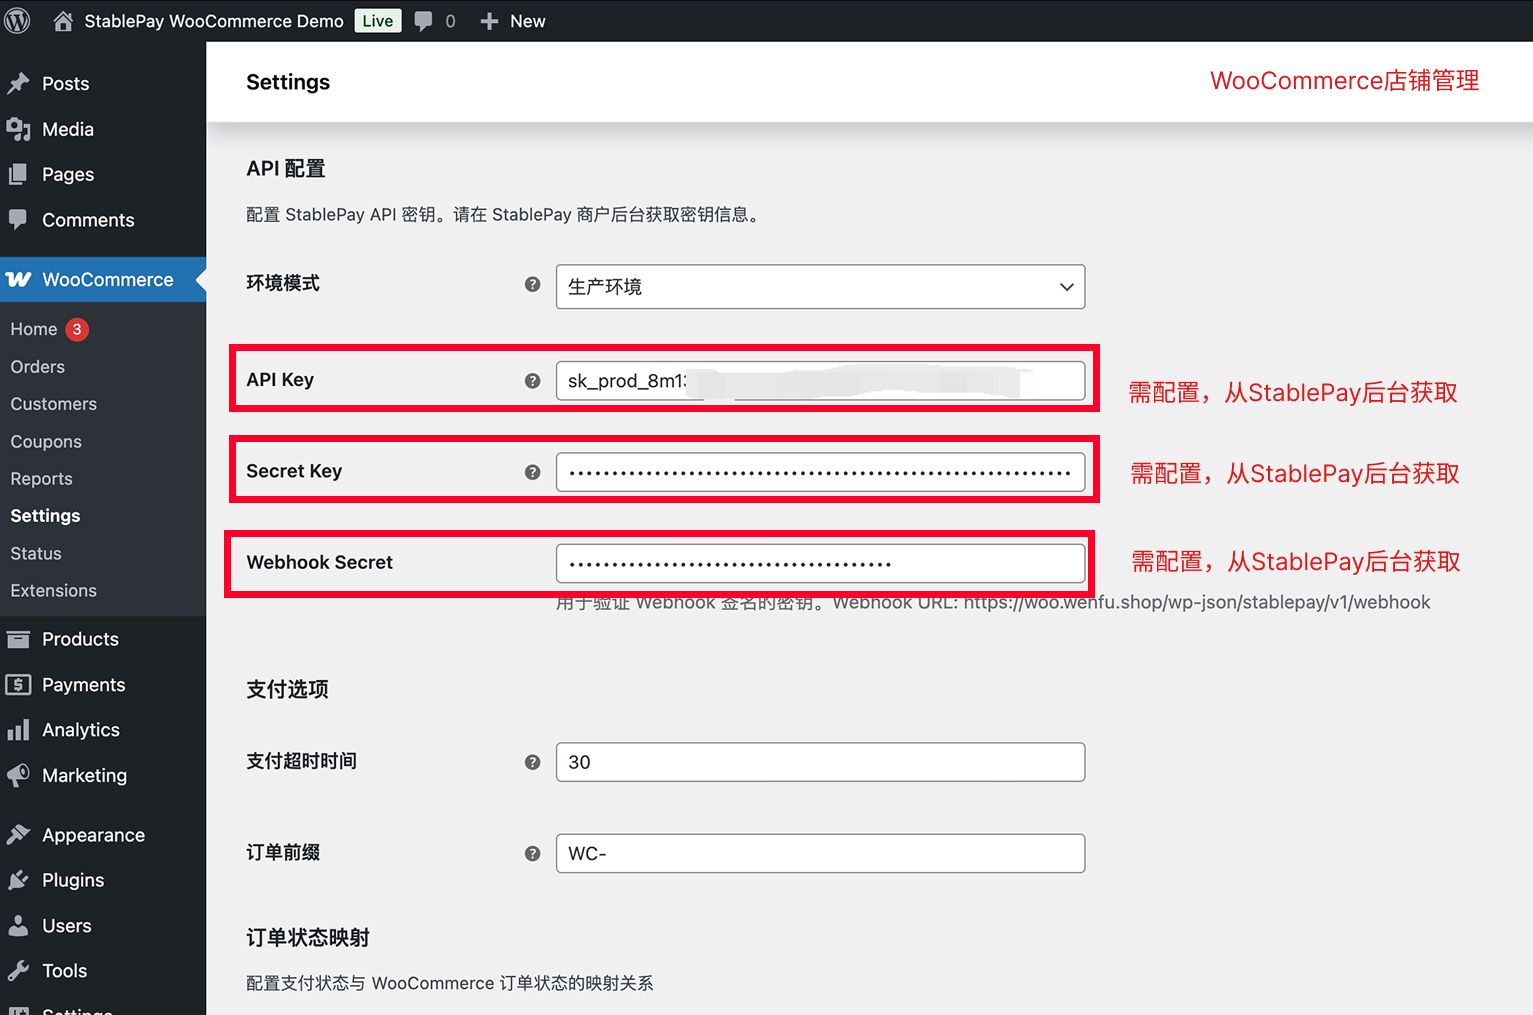
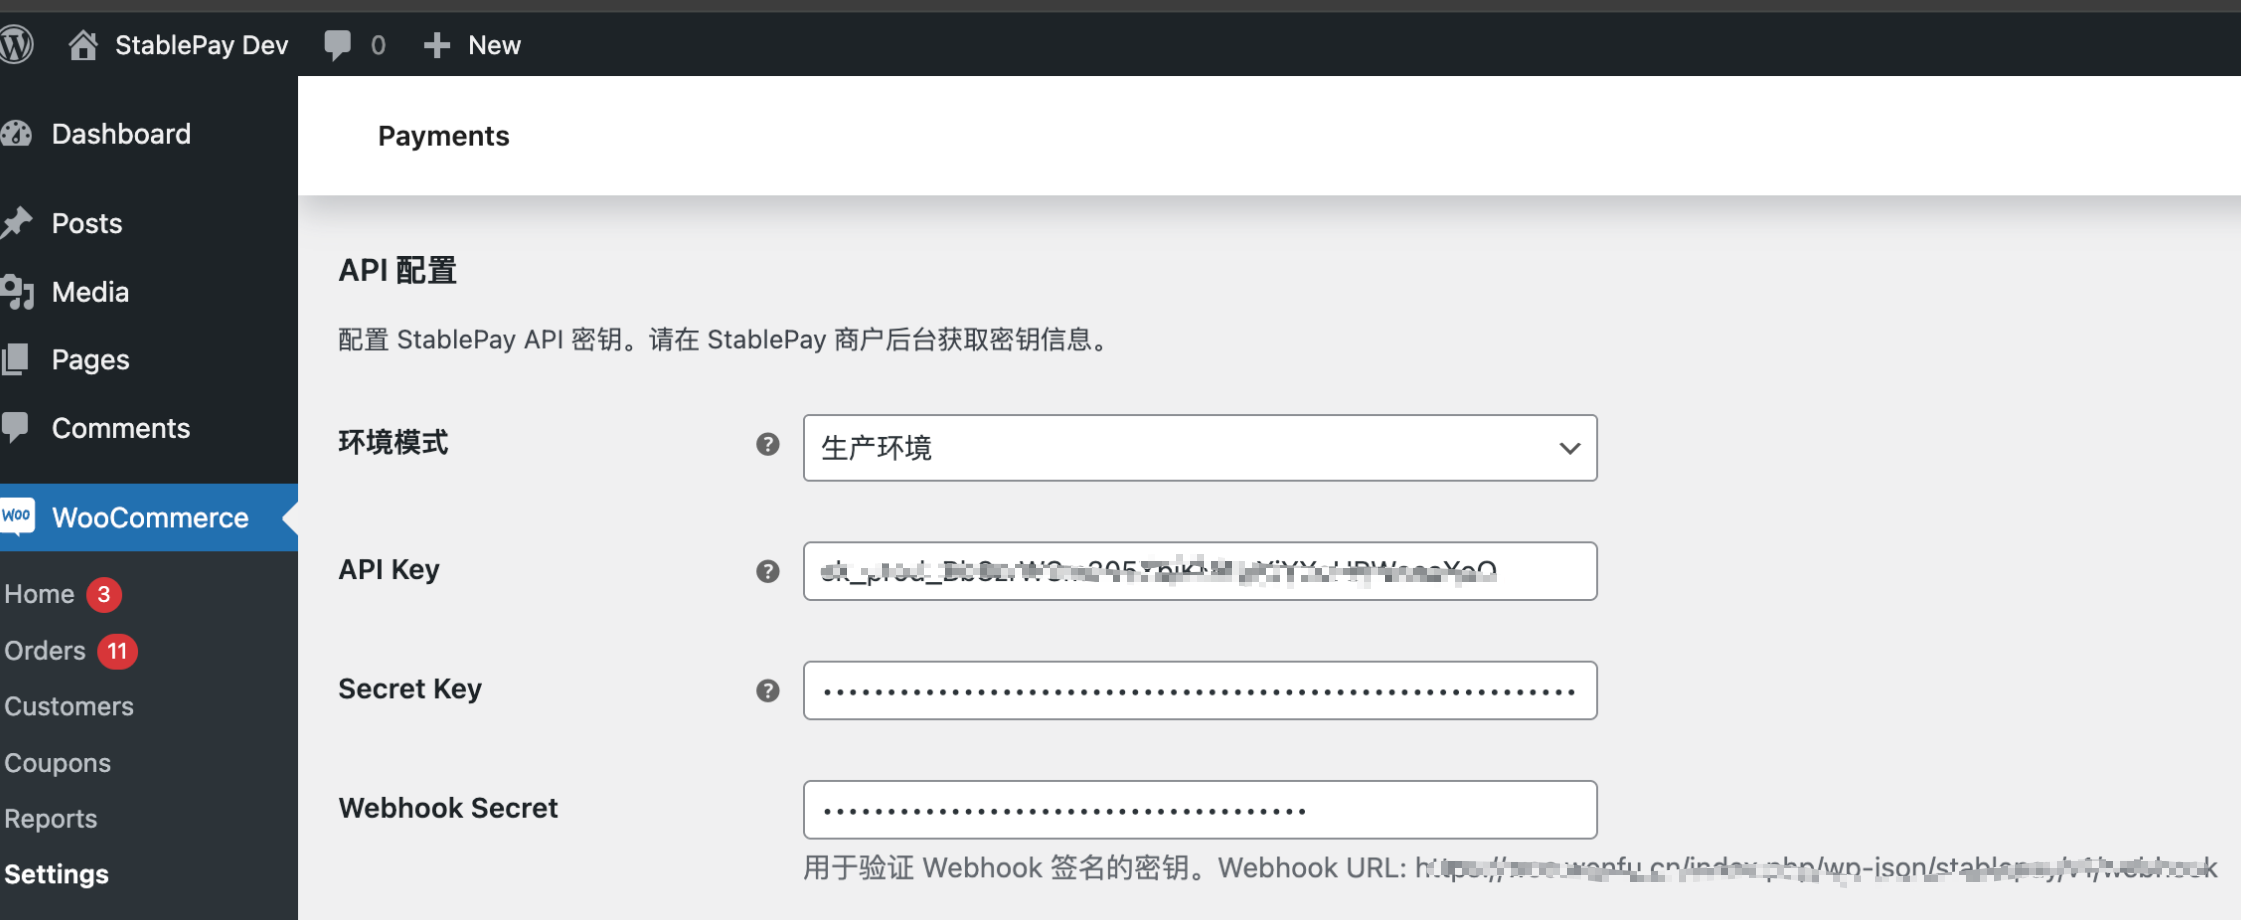
3.3 API 配置
| 配置项 | 说明 | 示例 |
|---|---|---|
| API Key | 从 StablePay 后台获取的 API Key | ak_xxxxxxxx |
| Secret Key | 从 StablePay 后台获取的签名密钥 | sk_xxxxxxxx |
| Webhook Secret | 从 StablePay 后台获取的 Webhook 验证密钥 | whsec_xxxxxxxx |
步骤 1:登录 StablePay 商户后台,进入店铺管理
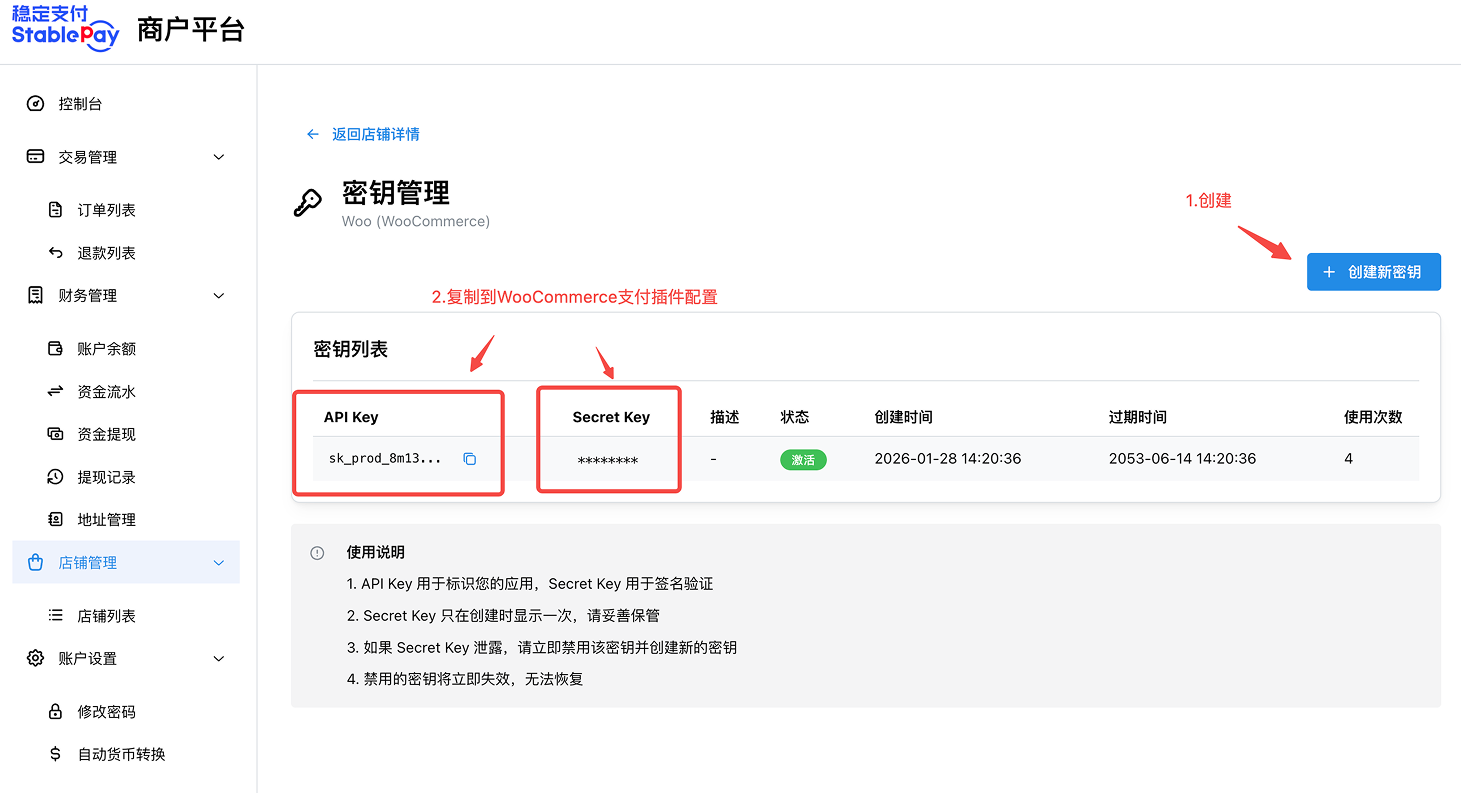
步骤 2:创建 API Key
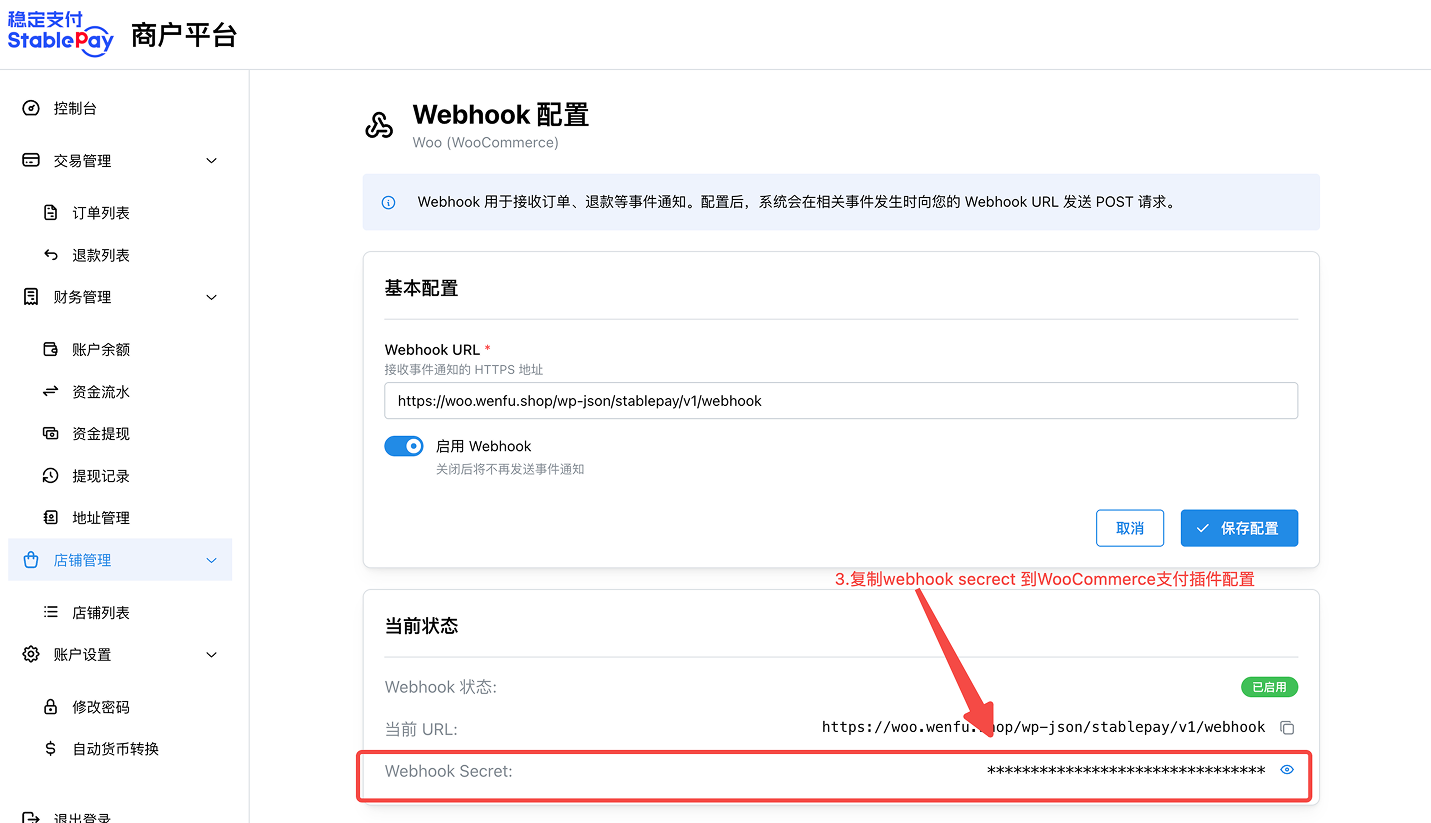
步骤 3:获取 Webhook Secret
⚠️ 安全提示: Secret Key 和 Webhook Secret 为敏感信息,请勿泄露给他人。
3.4 配置 Webhook
Webhook 用于实时接收支付状态通知。配置完成后,插件会自动生成 Webhook URL。
Webhook URL 格式:
https://your-domain.com/wp-json/stablepay/v1/webhook
请将此 URL 配置到 StablePay 商户后台:
- 登录 StablePay 商户后台
- 进入 店铺管理 页面,管理Webhook URL
注意
这里的Webhook URL 要通过WordPress后台查看,非店铺的URL地址
WordPress查看WebhookURL
3.5 支付选项
| 配置项 | 说明 | 默认值 |
|---|---|---|
| 支付超时时间 | 支付会话有效期(分钟) | 30 |
| 订单前缀 | StablePay 订单号前缀,便于识别来源 | WC- |
四、测试验证
配置完成后,建议进行一笔小额测试订单,确认支付流程正常。
4.1 验证清单
- [ ] 结账页面能看到 StablePay 支付方式
- [ ] 选择 StablePay 支付后能正常跳转到收银台
- [ ] 支付完成后能自动跳回商户网站
- [ ] 订单状态能自动更新为「处理中」
- [ ] 订单详情页能看到 StablePay 支付信息
五、日常运营
5.1 查看订单支付信息
- 进入 WordPress 后台 → WooCommerce → 订单
- 点击订单号查看详情
- 在「StablePay 支付信息」模块可查看:
- 支付会话 ID
- 支付币种
- 实收金额
- 交易哈希(可在区块链浏览器查看)
5.2 处理退款
- 在订单详情页点击「退款」
- 输入退款金额和原因
- 点击「通过 StablePay 退款」
- 等待退款处理完成
退款说明:
- 仅已支付订单可退款
- 支持全额退款和部分退款
- 退款期限为支付后 180 天内
- 退款将原路返回到消费者钱包
六、常见问题
Q1: 插件激活失败怎么办?
检查项:
- PHP 版本是否 ≥ 7.4
- WordPress 版本是否 ≥ 5.8
- WooCommerce 是否已安装并激活
- cURL 扩展是否启用
Q2: 支付成功但订单状态未更新?
可能原因:
- Webhook URL 未配置或配置错误
- Webhook Secret 不正确
- 服务器防火墙阻止了回调请求
解决方案:
- 确认 Webhook URL 已正确配置到 StablePay 后台
- 检查 Webhook Secret 是否一致
- 检查服务器防火墙设置
- 查看日志确认是否收到 Webhook 请求
七、技术支持
如有任何问题,请通过以下方式联系我们:
- 官网:https://stablepay.co
- 商户后台:https://merchant.stablepay.co
- 技术支持邮箱:support@stablepay.co
- 文档中心:https://docs.stablepay.co